Materials needed:
Bermuda bay cardstock
1 piece 5-7/8" x 8-1/4 score on the longside at 4-1/8" for card base
White basic cardstock
2 pieces 4" x 5-3/4" - for the inside and front of card layer
1 piece approx 5-7/8" x 4-1/8" - for the die cutting of the leaves
Bermuda bay classic stampin' pad
Granny apple green classic stampin' pad
Blending brushes
Rhinestone basic jewels
Snips
Card Instructions
Score, fold and burnish the card base.
Attach the inside white layer to the card.
Die cut the apperture out of the front of card layer as below.
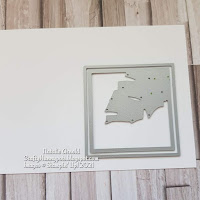
Now with the other piece of white card die cut the leaves border out.
Now with the waste piece from this section stamp all of the images needed, using first, second and third generation of ink for the flowers.
Using the snips fussy cut all of these images out.
Now using the blending brushes ink the leaves border and the leaf frame section using both the colour inks until the colour you like.
Lay the finished leaf border on the front of card layer and see where you would like to stamp some of the little flower images, making sure that you wipe off any ink that goes onto the section of the image that isn't required, I used post it notes to cover mine up, remembering to remove each time I stamped. Once I had all the flowers I needed I glued the leaf border into place.
Now glue this whole front of card layer into place. Carefully place glue on the back of the frame and glue this into the apperture part on the front of the card base.
Glue all of the fussy cut flowers and the 'Thank you' sentiment into place add some rhinestones and the card is finished. Quick and easy card but, I love these colours together!
Hope you enjoyed my card and hop over and give me your vote, I really would appreciate it, thanks in advance. Have a lovely day and I will see you on the next months challenge with a new project for you.
Take care everyone
Huge Crafty Hugs
Natalie xx
APRIL HOST CODE FOR ORDERS ON LINE UNDER £150
TE6EFTZ9
Product List


Beautiful! I love the shading of the paper.
ReplyDeleteThankyou so much Theresa x Natalie
DeleteI love those pretty little flowers in the various shades. Thanks Natalie for being part of my International Blog Highlights this month and all the best with the voting!
ReplyDeleteThankyou once again for making it possible to for us all to come together and share all of our makes I love the taking part x Natalie
DeleteVery neat card, love these colours and the cutout idea🙂
ReplyDeleteThankyou so much Lesley x Natalie
DeleteA lovely card, Natalie!
ReplyDeleteThankyou Kim x Natalie
DeleteVery clever Natalie. The two tone Thank You looks great.
ReplyDeleteThankyou so much Karen x Natalie
DeleteSuch a pretty card, beautifully coloured and a great technique! Thank you for the detailed instructions. Good luck with the voting
ReplyDeleteLiane from Germany
Thankyou so much Liane for your lovely comment x Natalie
DeleteOoooo absolutely gorgeous card, Natalie, love the colours! I think blue and greens are my favourites :) love all the textures on your card, many thanks for sharing and good luck with the voting :) x
ReplyDeleteThankyou so much Anne I do love these 2 colours together think they blend together so well x Natalie
DeleteI see you and I were thinking alike! I love your version of the Tranquil Thoughts bundle. My favorite colors!
ReplyDeleteThankyou Robbie yes I think we definitely were. I'm loving the Tranquil Thoughts bundle it's such a great one to use x Natalie
DeleteI love the colors you used. Such a fun & happy card! :)
ReplyDeleteThankyou so much Kim I have to say I love these colours together think they work really nicely together x Natalie
DeleteSuch a beautiful card!
ReplyDeleteGood luck with the voting, Simone from Germany
Thankyou so much Simone x Natalie
Delete