
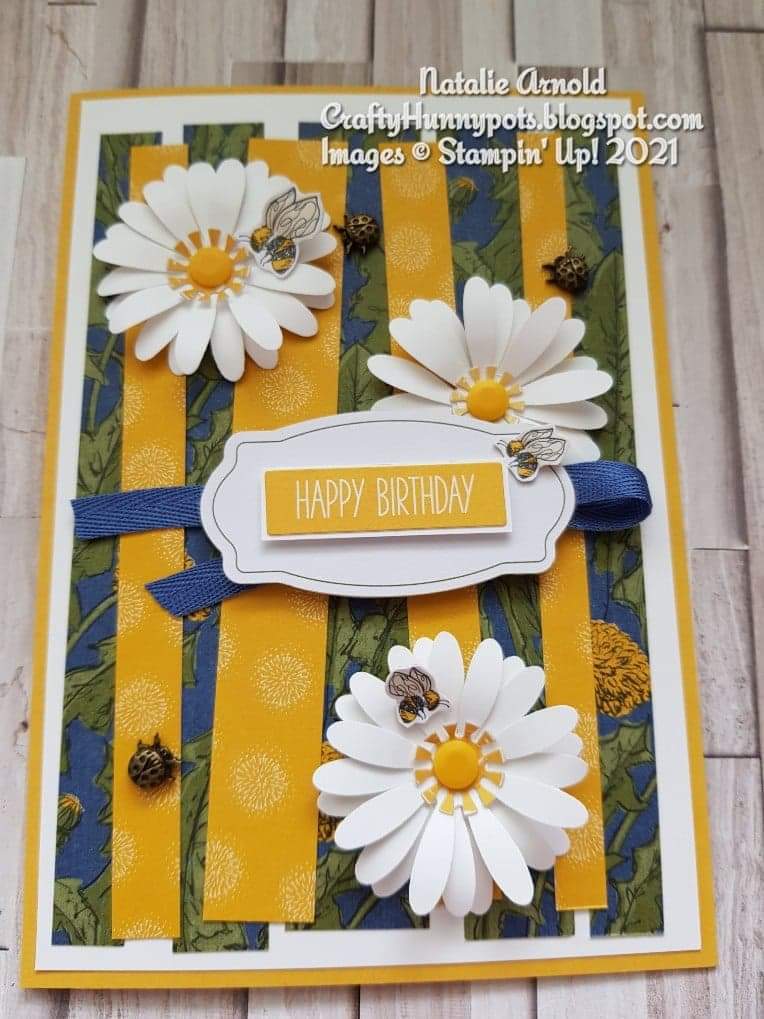
Hello, hello thought I'd come on quickly and share a really quick card with you all that I made for a challenge on one of my groups. The challenge was to follow a sketch and see what we came up with, and oh my I had so much fun I had to share. This is a great challenge as it uses a technique using up all of your scrap strips of paper...... so let's begin
Materials needed:
Bumble bee cardstock
1 piece - 5-7/8" x 8-1/4" score on the longside at 4-1/8" for card base
Basic white cardstock
2 pieces - 4" x 5-3/4" for the front and inside of card layers
3 pieces approx 2" x 6" for die cutting 9 daisies from
Scrap piece for the sentiment and tag to adhere to
Dandy Garden dsp
9 strips different thicknesses and heights ( I've used same paper both sides)
Dandy Garden memories & more card pack
Sticker sheet for the sentiment tag, sentiment, bumble bees and inner parts of flowers
Playing with patterns resin dots
3 x large dots for flower centres
Misty moonlight ribbon
Length approx 6-1/2" for behind the sentiment
Ladybug trinkets
3 for front of card
Medium daisy punch
Dimensionals
Glue dots
Multipurpose liquid glue
Card Instructions
Fold and burnish the card base. Adhere the inside layer to the card.
Adhere all of the paper strips onto the other white card layer using glue, so that they all lay differently and some overlap at the front, now attach to the front of the card.
Punch out 9 daisies and glue them together in 3's giving them all a slight curve with the bone folder.

Place the stickers into the centre of each flower and add a resin dot on top.
Place the tag and sentiment onto the white card scrap piece and fussy cut around them, but leave a small border around the sentiment showing. Do the same with the bumble bees (this just enables them to look 3d on the card front rather than just stuck on flat).
Using glue dots attach the ribbon to the card front where the sentiment will be sitting. Attach the sentiment to the tag using dimensionals and the tag to the front of card also using dimensionals.
Attach the flowers and bumble bees with glue, and the ladybugs by placing a glue dot on the back. The card is finished.

Hope you enjoyed the quick card and give it a go it's a great way of using up those bits of paper you might otherwise not use, and I think it makes a lovely background to any style card.
Huge Crafty Hugs
Natalie xx
APRIL HOST CODE FOR ORDERS ON LINE UNDER £150
TE6EFTZ9
 | ||
 |  | |
 |  | |
 |  |  |
 |  |

 Designer Series Paper")

 2020–2022 In Color Ribbon")
Love new products, love getting your hands on them earlier than you thought?
Well now is your chance ......... the new annual catalogue launched for demonstrators to pre order as of today 1st April - doesn't go live to the customers until 4th May!!!. Join Stampin' Up! today through until 3rd May and you too could get your hands on some of the new products early. To join my team just click on the side bar banner 'Join my team' and it takes you straight to where you need to be and I'd love for you to be part of this amazing journey I'm on with Stampin' Up! on my CraftyHunnypots team!


And we all keep the leftover pieces of DSP, this is such a clever way of using them up. And who know! Well done Natalie
ReplyDeleteAwww you're welcome Debbie now you can use up all those pieces 🥰 have fun x Natalie
Delete