About Me

My photo
My name is Natalie and I love anything to do with card/paper. I have been a papercrafter for many years now and I never get bored playing with all the wonderful products available. I've been married to my wonderful husband Nathan for 35years now and we are still very much in love with each other as the first day we met each other. We have 3 wonderful children and 5 gorgeous grandchildren so we have lots to be thankful for. Since joining Stampin' Up! in 2018 I've grown so much in confidence with myself and I even tackle technology, which for me is a huge step to have taken, but I'm getting there slowly.

Tuesday 27 October 2020

SUOC#261 - Autumn/Fall


Hello again and welcome to another SUO challenge, this time the theme is Autumn/Fall and I love this season with all the different beautiful colours of the leaves. So when I saw the theme I thought 'great let's get started'.....................


So the card I've made today is using the quilting/patchwork technique, which is a great technique to use when you have lots of pieces of dsp leftover that you just can't simply bare to waste........I know I can't.


Materials needed:


Cajun Craze cardstock

1pc - 5 1/2" x 11" scored on the longside at 5 1/2" this is the card base
Scrap pieces to die cut 2 x leaves


Very vanilla cardstock

2pc - 5 3/8" x 5 3/8" for the front and inside of card layers
Scrap pieces to die cut 4 x leaves
1pc - 3/4" x 3 7/8" for the sentiment banner


Mint macaron cardstock

Scrap pieces to die cut 4 x leaves


Early Espresso cardstock

1pc - 7/8" x 4" for the sentiment banner layer


Gilded gems

3 x small and 3 x large for front of card


Brass foil sheets

9pc - 1 11/16" x 1 11/16" for the front of card


Gilded Autumn speciality dsp

9pc - same sheet opposite sides 1 5/8" x 1 5/8" for the front of card
1 sheet with the leaves on to be punched out


Card recipe:


1. Cut, score and burnish the card base piece.
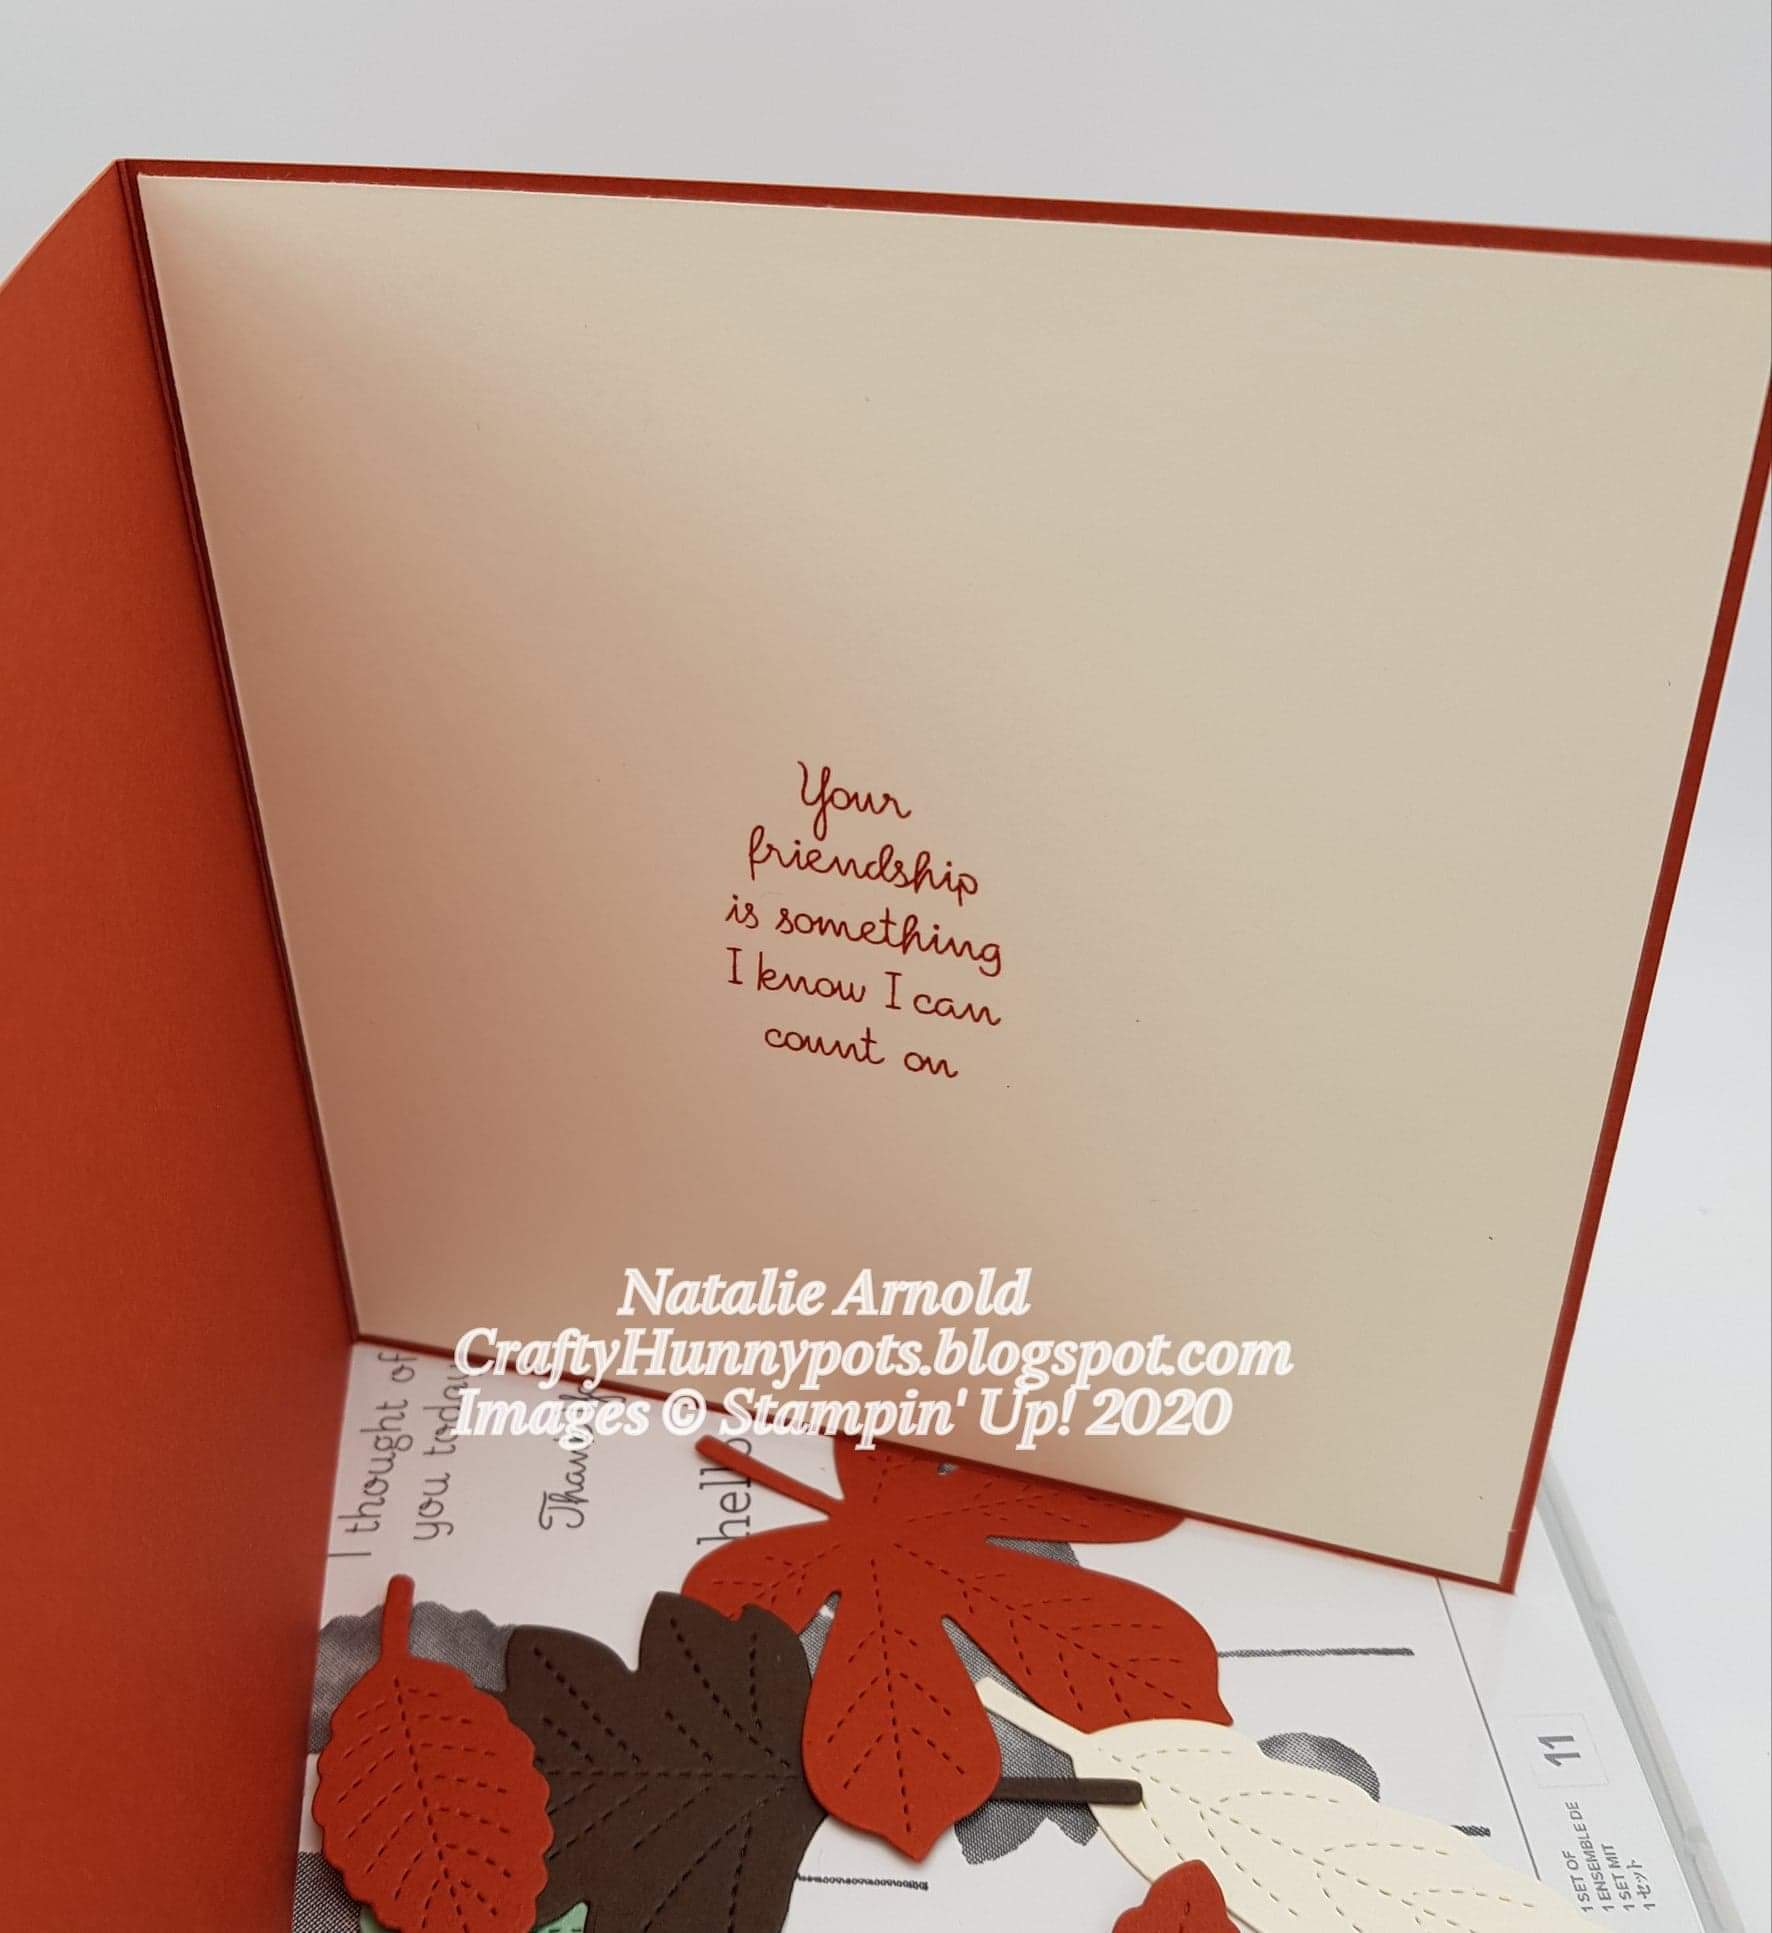
2. Cut out the very vanilla pieces, stamp the sentiment for the inside of the card and glue to the inside.


3. Cut out all of the brass foil and the dsp pieces of card. Using a take your pick tool and a pierce mat, pierce round all of the edges of the dsp pieces and then glue these pieces to the brass foil pieces, leaving the edges sticking up a bit.


4. Glue all of these squares to the very vanilla piece of cardstock that you've cut for the front of the card, making sure you leave an even border around all of them, and once dry glue this whole piece onto the front of the card flat.
5. Die cut all of the leaves and punch out all of the little elements that are needed for the front of card. Glue all of these bits onto the card, not completely flat leave them with the edges curled up so they look like they have just fallen and landed there.
6. Stamp the sentiment onto the very vanilla piece of card and punch the ends using the banner punch. Now cut the early espresso piece and again punch the ends, give the very vanilla piece a slight curl and then just glue the ends of it to the early espresso piece (this just gives more dimension to the card).
7. Place dimensionals onto each end of the sentiment banner and glue to the front of card.
8. Place the gems onto the card and that is the card finished.

Hope you like the card and give it a go yourself, it is fun using this technique and it's also satisfying to use up those bits of dsp that were just sitting around.

Thanks for hopping onto my blog and having a look, I really do appreciate it. Happy crafting and stay safe.
Big Crafty Hugs

Natalie xx


If shopping with myself on line during the month of October and spending less than £150 then please do use my host code so that I'm able to send you a small gift in the post the following month to say thankyou xx

OCTOBER HOST CODE

DBBJMKQC


Sweetest time christmas card


Hello again everyone can you believe it's tuesday already and it's time for another Tuesday make. This week I've chosen the 'Sweetest time' bundle as I think it's really great for creating cards with lovely borders on them, so without anymore chit chat lets make a card............

Materials needed:


Whisper white thick cardstock

1pc - 6" x 8 1/4" scored on the longside at 4 1/8" for cardbase

1pc - 15/16" x 3 1/4" for the sentiment

Scrap piece for stamping and die cutting 3 x berries


Real red cardstock

1pc - 6" x 4 1/8" die cut both longsides for front of card

1pc - 3 7/8" x 5 3/4" for the inside of card

Scrap piece to die cut 2 x candy canes and 2 x circle sweets to add depth


Shaded spruce cardstock

Scrap pieces to die cut 6 x small leaves and 3 x large leaves


Pear pizzazz cardstock

Scrap piece to die cut 3 x ferns

1pc - 1" x 3 1/2" for the sentiment layer


Real red sheer ribbon

A length long enough to tie 3 x bows for front of card


Wonderful gems

2 x red/gold and 3 x clear/gold for front of card


Real red classic stamp pad

To stamp the berries


Garden green classic stamp pad

To stamp the sentiment


Card recipe:

1. Cut, score and burnish the whisper white card base piece.

2. Cut both of the real red pieces of cardstock and glue the inside piece to the card.

3. Die cut both of the long sides of the other real red piece as in the pictures below.


4. Glue this piece flat to the front of the card using wet glue.

5. Die cut the extra candy canes and circle sweets, give them a slight curve using a bone folder and then glue them, not completely flat, onto the card front, as in the pictures below. (they go on either side opposite each other).


6. Die cut all of the leaves and ferns, stamp and die cut the berries and then using wet glue adhere them onto the card.

7. Tie 3 x bows and using mini glue dots adhere to the card (I've glued mine onto the candy canes down the side of the card), if you prefer tie 3 knots instead of bows.

8. Cut the pieces of card for the sentiment, stamp onto the white piece,  give this piece a slight curl and then just placing wet glue onto the ends attach it to the green piece, now glue this flat to the front of the card.

9. Adhere your gems onto the front of the card and thats the card finished.

Thanks so much for hopping onto my blog and having a look I really appreciate it, happy crafting and stay safe.

Big Crafty Hugs

Natalie xx

Here are a couple of other cards that I've made using this bundle.....


Please remember when placing an on line order with myself to use the host code for orders under £150 so that I'm able to send you a small gift the following month in the post many thanks xx


OCTOBER HOST CODE

DBBJMKQC


Product List

Paper Trimmer
[152392]
£23.00
Paper Snips
[103579]
£9.25


Tuesday 20 October 2020

Autumn fun fold card


Hello everyone, and welcome to another tuesday of crafting. Today I'm using the lovely autumn leaves, as after having gone out for a lovely walk on Sunday seeing all the amazing colours of the leaves and having the smell of autumn in the air, I just couldn't resist.
I've made a fun fold card for you all today, it's a very easy fold but it's very nice on the eye, so let's begin and make a card together.

Materials needed:

Early espresso cardstock

1pc - 4 1/8" x 11 1/2" scored on the longside at 2 7/8" and 5 3/4" - cardbase

1pc - 4 1/8" x 5 3/4" - front of cardbase layer

Very vanilla cardstock

2pc - 4" x 5 5/8" - front of card and inside layer

1pc - 3 1/4" x 4 13/16" -  front of card topper 

Scrap pieces for the 3 sentiments

Cajun craze cardstock

1pc - 3 3/8" x 4 15/16" - front of card topper

1pc - 3 3/8" x 3 3/8" - die cutting of a maple leaf

Mint macaron cardstock

Scrap pieces for 2 sentiment layers

Gilded Autumn speciality DSP

1pc - 3 7/8" x 5 1/2" - front of cardbase layer

1 sheet with the leaves and acorns on to punch out what is needed
( 3 acorns, 2 mint macaron maple leaves, 2 cajun craze maple leaves, 1 cajun craze oak leaf and 1 mint macaron oak leaf) 4 small leaves fussy cut out.

Basket weave ribbon

1pc - approx 5" for wrapping round the front of card topper

Acorn trinkets

2 for tying onto the ribbon

Thread

A length to place through the acorns and tie them and the 'Happy Birthday' sentiment into place. I've used a copper thread which has now unfortunately retired but any thread will work.


Card recipe:

1. Cut, score and burnish your cardbase piece using your trimmer, mking sure when you score you use the score blade and not the cutting blade.
2. Cut all of your pieces of card and dsp ready for the card layers and topper.
3. Glue the very vanilla piece onto the early espresso piece (for the front of the cardbase), then glue the dsp piece onto it and now glue this whole piece onto your cardbase as in the picture below.


4. Glue your very vanilla piece onto the inside of your cardbase.
5. Glue the other piece of very vanilla onto the cajun craze piece of cardstock and once dry cut out your maple leaf.


6. Attach your piece of ribbon to this topper now using tear n tape adhesive to hold it in place on the reverse side, now using wet glue attach this piece to the front of your cardbase, do it at a slight angle as it fits easier and looks nice too.
7. Cut out a cajun craze leaf using the piece of square cut card, keep this piece aside for another card (no wasting it), and then glue the leaf onto the other die cut leaf.


8. Glue this onto the front of your cardbase using mini dimensionals.
9. Place your thread through the 2 acorns and tie this tightly to the ribbon so that it scrunches the ribbon up.
10. Stamp all of your sentiments onto the very vanilla scrap pieces, and then glue them flat to the mint macaron scrap pieces and cut a small border all the way around the edges. The happy birthday sentiment is not mounted onto mint macaron instead you need to punch a small hole in one end and attach it to the acorns using the same piece of thread that is already attached, making sure everything is tied on nice and securely (as the acorns are heavy and you don't want them to fall off).
11. Punch out all of your leaves and acorns, fussy cut the little leaves and then glue them all into place on your card front (the acorns are attached using 1 small dimensional for each of them). 
Card finished.  Hope you enjoyed it and found a bit inspiration for making some more. I've attached a picture below of what I made using the square piece of cajun craze cardstock with the leaf apperture, to give a little more inspiration, and leaving no waste yayyyyyyy...........


Happy crafting everyone until the next blog take care, stay safe and enjoy crafting.

Big Crafty Hugs
Natalie xx


Please if placing an on line order with myself  and its under £150 use my Host code for the month of October and receive a small thankyou gift from me the following month thankyou.

October Host Code

DBBJMKQC


Product List
Paper Trimmer
[152392]
£23.00
Paper Snips
[103579]
£9.25