

Hi everyone! This weeks craftalong is another card using the same bundle as last week, this time though we're making a bridge card, which I had lots of fun making, and I hope you will too........................ so let's see how we make it.
1. Cut a piece of Old Olive cardstock 5" x 7" score at 1, 2, 5, and 6" then fold - first score line down, second up, 3rd up and fourth down so that your cardbase will stand up on it's own.
2. Cut the piece of dsp from the New Horizons 6" x 6" designer papers - I cut 5/8" from the top and the bottom this leaves the paper to measure 4 7/8" x 6". Now with the 6" side at the top of your trimmer cut 2 pieces that measure 7/8" then a piece that measures 2 7/8" and then 1 piece that measures 7/8", from another sheet of the same pattern paper cut a piece that will measure 4 7/8" high by 7/8" for layering onto the last panel of the cardbase. Glue all of the pieces onto the cardbase. Using Black memento ink (132708 forgot to add to product list), stamp the birds onto the middle panel section.
3. Cut a piece of the window sheet 3/4" x 4 7/8", this is going to be the piece that forms the bridge across the centre of the card, this is glued into place over the paper layer, lining it up evenly, using tear n' tape.

Place the tape onto the paper, take the backing off and attach the window sheet in place. It was easier doing it this way as you could see where you were placing the window sheet.
4. Die cut the two gate pieces, having stamped the wood image onto basic white cardstock, using crumb cake ink (147116 oops forgot to add this to product list too 😏). Placing a very small amount of glue onto the reverse side of the gate pieces, this will only be on the bottom section of them as we don't want glue where not needed leaving everything sticky, attach them onto the window sheet.
5. Die cut 2 pieces of the hedgerow using Old Olive cardstock and 4 from the papers, you will need to cut 2 of the paper ones from the wrong side pattern so that you can turn it over, this enables you to have the hedgerow coming in from both sides. Attach 2 of the paper ones to the middle inside of the card base, and the others will all go on the front of the window sheet, glue the cardstock ones first and then the paper ones on top, off setting them a bit to give more dimension.
6. Die cut 2 of the tree pieces out, again one in Old Olive and the other in the pattern paper, glue them together, this gives the paper piece stability, the card layer will not show, attach dimensionals behind and attach to the inside of the card base.
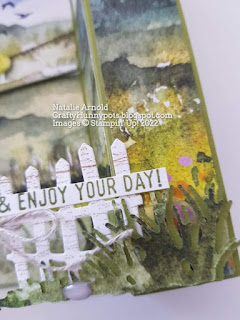
7. Stamp the sentiments from the 'On the Horizon' stampset, using Old Olive ink, fussy cut them out and then glue to the gates. Tie a piece of the linen thread to the gates and attach a bow on top using a glue dot.
8. Stamp the 'Happy birthday' from the 'Happiest of birthdays' stampset again using Old Olive ink and then fussy cut each letter out individually. Pierce a hole on each side of the card base side panels and then tie a length of the linen thread across, tying a knot on the reverse side of each end. Carefully attach each of the letters in order onto the linen thread using a very very small amount of glue. Add a few of the pebbles and the brass butterflies to finish the card off.

Adding a butterfly to the window sheet makes it look like it's really flying!

This is how the card will look from above .
Hope you enjoyed todays project, I loved making this. The fussy cutting of the letters was time consuming, but I thought it looked great once I'd finished it making all worth the time. If you struggle with fussy cutting you can always just use the words as a banner across the front of the card instead, there is no wrong or right way, it's your way.
Until next time
Huge crafty Hugs
Natalie xx
If you choice to shop with me this february please do use the Host code 2CST62PU which will enable me to send you a small gift the following month. Thanks in advance x
A list of what I used is below.
Product List
") |  | |
 |  | |
 |  |  |
 |  |  |
 |  |  |
 |  |
 Designer Series Paper")
")


")
")


