

Basic white cardstock - 3pc 8.4cm x 12.8cm for the front of card layer and for the inside - both sides 2pc 5cm x 5cm for die cutting of the square panels Scrap piece for the stamping of sentiment
Pansy petals dsp - 1pc 8.8cm x 13.2cm for the front of card layer
Calypso coral cardstock - 1pc 5cm x 5cm for layer underneath the die cut square 1pc 2.5cm x 2.5cm cut in half corner to corner for the triangle section on the front of card Small scrap piece for die cutting of flower
Pale papaya cardstock - 1pc 5cm x 5cm for the layer underneath the die cut square 1pc 2.5cm x 2.5cm cut in half corner to corner for the triangle section on the front of card Small scrap piece for the die cutting of flower
Pretty flowers embossing folder - for embossing the large coloured squares
Champagne rhinestones - 3 for front of card
White bakers twine - for double bow on front of card
Instructions:
1. Fold and burnish the cardbase and glue the 2 pieces of basic white card to the inside of card.
2. Glue the other basic white layer to the piece of dsp, cut the 2 small square coloured cardstock pieces in half (corner to corner) and then attach one of each colour to the reverse side of your layers, now attach to the front of the card flat using glue.
3. Emboss the large coloured squares, die cut the 2 basic white squares and then attach together using glue, leave some of the leaves and flowers not glued so that they can be slightly curled, giving them a bit of depth. These are now attached to the front of the card using dimensionals.
4. Having die cut 2 flowers one from each colour cardstock, give these a slight curl using the bone folder and then with a small amount of glue attach them onto the flowers that are within the die cut squares, alternating the colours with the embossed background squares..
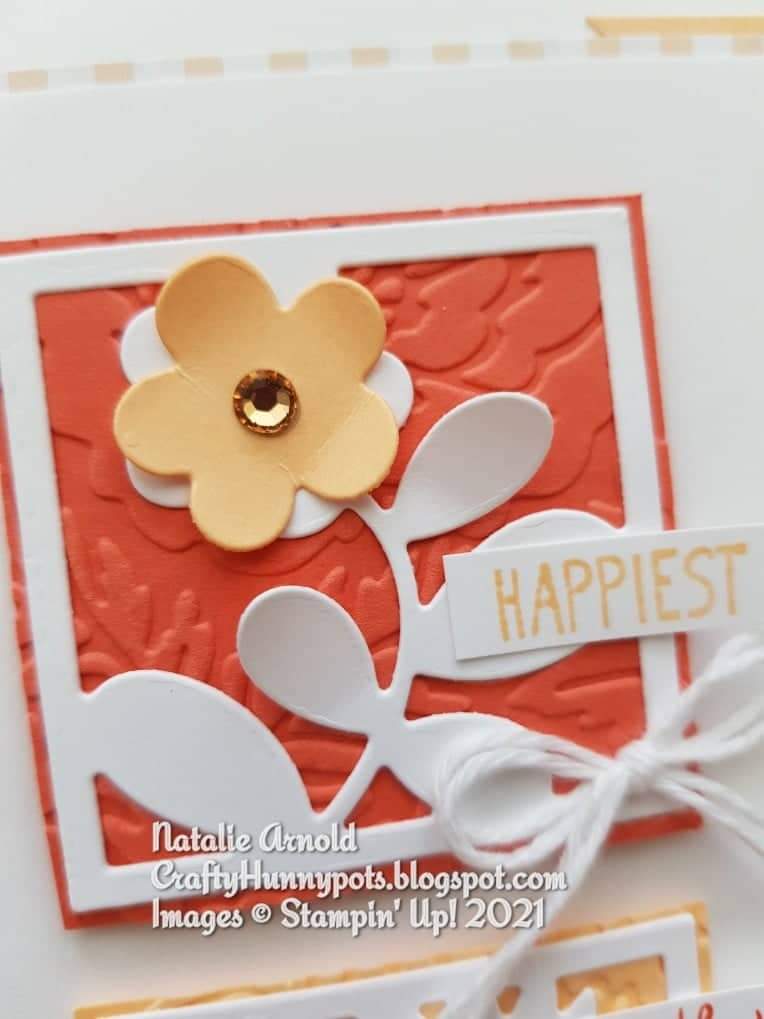

5. Stamp the sentiment, I stamped it twice, once in each colour of the inks, I used Pale papaya and Calypso coral, and then fussy cut the words out so that I had different colours, again alternating the colours. These can be given a slight curve and then attached to the card using glue.
6. With a length of the twine folded in half tie a bow, having it folded will give you a double bow, this was then attached using glue.
7. Attach the rhinestones to the centres of the flowers and one on the card and that is the card finished.
Hope you enjoyed todays project, I just love the depth you can get using these delicate die cut squares, without having to do an awful lot to achieve it!...................
Until next time
Huge Crafty Hugs
Natalie x

Product List
") |  | |
 |  | |
 |  | |
 | ||
 |  |  |
 |  |  |
 Designer Series Paper")


Natalie Arnold - Independent Stampin' Up! demonstrator in the UK


Fabulous card, Natalie, love all the colours and details, these square dies are super cute and very effective. Many thanks for sharing :) x
ReplyDelete