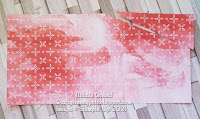
Hello again everyone and welcome to the SUOC#273 where this week we are looking at using our designer series papers, and I don't know about all of you but I have a fair few that are going to very soon be retiring so I need to get my skates on and get them used up! So today I have what's known as a double pleat fold on my card, this is a great way of showing both sides of your paper off at the same time. It's a really easy folding technique and I think it looks cool on the front of any card for any occasion, so let's get started!.
Materials needed:
Basic white thick cardstock
1 piece A4 (UKsize) card cut on longside at 14.85cm and 10.5cm on shortside - cardbase of which you will get 2 from 1 sheet
1 piece - 10.5cm x 2.4cm - for the sentiment layers
1 piece of scrap to die cut the sentiment tab
Basic white cardstock
1 piece - 10.1cm x 14.45cm - for inside of card layer
Merry Merlot cardstock
1 piece - 10.1cm x 7.2cm - front of card embossed layer
Bumble Bee cardstock
1 piece - 10.1cm x 7.2cm - front of card embossed layer
1 piece - 10.3cm x 2.2cm - for the sentiment layers
Fine Art Floral DSP
1 piece - 5" x 10" - for the pleated fold piece on front of card
Gilded Gems
Ornate Floral 3D embossing folder
Card instructions
Fold and burnish the cardbase and adhere the inside layer to it.
Place the 2 pieces of coloured cardstock into the embossing folder together and emboss them through the Stampin' cut and emboss machine, or whichever one you have. These 2 pieces can be adhered flat to the front of the cardbase.
Now you need to work on the pleated section for the front of the card as follows:
On the 10" side you need to score in inches at : 1, 1-1/2, 2-1/2, 3, 4, 4-1/2, 5-1/2, 6, 7, 7-1/2, 8-1/2 and 9. Now on the 10" side mark both sides at 4-1/2" and 5-1/2", turn to the 5" side and mark both sides again at 2" and 3". Now you need to cut the four corners off using the marks as a guide.
Now you need to fold the paper into the pleats : The first fold will be a mountain fold (make sure the paper you want showing is facing towards you), then a valley fold, mountain fold and so on until the middle, then turn and do the opposite side exactly the same. I've made 2 cards using both sides of the paper to show how different they look so my paper is with the opposite side facing me for the pictures shown.


No comments:
Post a Comment