

Hi everyone I'm quickly coming on to show you all how I made my clutch bag, that was on Scrimmpy mommys Youtube video on saturday.
Amanda Charlesworth is my amazing up line for Stampin' Up and she very kindly shared something of mine on her youtube. I was absolutely taken aback by this, and thought as some people had asked for measurements on how to make it, then it was only fair to let everyone know.
First of all though I must say that the idea wasn't mine, I saw a lady myself on youtube making this from 3 years ago and her name is Kris Miller.
So without going on any longer here is how we make it.
Materials needed:
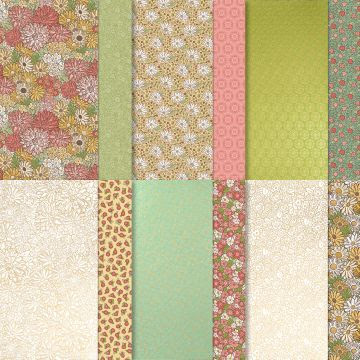
1pc 12" x 12" dsp (I used ornate gardens)
Old olive cardstock
1pc - approx 2" x 7" for the borders to be die cut
Small piece for 1/2" circle to be punched out for daisy centre
Bumble bee cardstock
Scrap piece for 3 x medium daisies to be punched out
Recipe:
1. Fold your dsp in half from corner to corner and burnish it well.
2. Place your creased edge onto the edge of your scoring board and score at 3/4" all the way down.
(no need to do both sides as the impression goes through to the otherside).

3. Open your dsp out and mark in the centre so that you can fold your 2 corners in to meet in the middle (see pictures below).
4. Now you need to fold your creases so that the 2 outer scores are valleys and the middle score is a mountain, with the inside of the bag facing you, this then forms the bottom of your clutch bag, and the pockets for your notecards to go in.

5. Now you can fold your front and back flaps of your bag over, the thickness of the flap is up to you, just make sure that both sides match up together.
6. Your magnets can now be placed on both sides of your bag (as in the picture below, making sure that you pair them up together properly otherwise they will fight against each other and not clasp shut).
When I first did mine I'd placed them in the wrong place as you can see, so learn by my mistake, as when you put your notecards and envelopes inside, where I'd first put the magnets they wouldn't work.

7. After die cutting 2 border strips you can then glue them to the reverse of your bag front flap (you will need to adjust the size accordingly).
8. I put a little bit of glue along the underside of both flaps and stuck them to the bag, so they don't keep flapping about and getting damaged.

9. Punch yourself 3 x daisies out and glue them together, glue the punched circle onto the front of the flower and then glue a gilded gem on top.
10. The only remaining thing left for you to do is decorate 4 x notecards and then place them along with 4 x envelopes into the middle of your clutch bag.
I think this makes a lovely gift for someone, you could even place a voucher inside as well.
Thanks so much for popping on and taking a look and for all of your support for me with my Stampin' Up journey it's most appreciated. Leave me a comment if you like I'd love it if you could.
Until next time take care and keep crafting
Big crafty hugs
Natalie xx
Product list:


Magnets are readily available from amazon or ebay
JULY host code for orders under £150 placed on line
WPSMKEK9


Perfecto- lovely Natalie ❤️
ReplyDeleteThanks Debbie it's such an easy make I loved making it x
DeleteWow, what fun! This is a very pretty holder for some cards :) lovely paper, many thanks for sharing :) x
ReplyDeleteThankyou Anne for your comment xx
Delete