Hello again and welcome to another Touches of Ink blog hop. We have another Winter/Christmas theme for this month, which really makes me happy, I love this time of year when we can go all out and keep making christmas cards and projects, my favourite makes!
So whether you have just hopped on to my blog from the lovely Simone, whom by the way is the lady that organizes this amazing blog hop every month, or you have just come on to see, a very warm welcome and thankyou!
For this months challenge I've made a rather cute box, which has another surprise box inside for you to store some delicious treats. So let's begin ..........
For this box you will need to use 12" x 12" cardstock for the size I've done.
For the lid you need a piece that is 6 1/4" x 8 1/4" and you will score on all 4 sides at 2 1/16" you will then cut this piece, score it and make each corner into a tab, these all get glued to form the lid.
I've cut a small piece off of each tab so that they don't sit on top of each other inside the box lid, they meet in the middle.
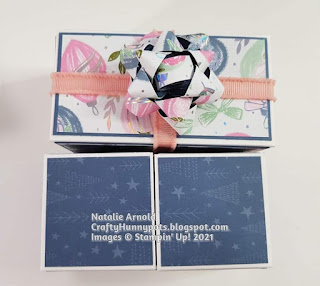
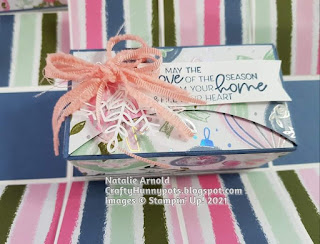
This is then decorated how you like and put to one side. I've used tear and tape to attach ribbon around the lid so that it looks like a wrapped present, constructed a paper bow with strips of the paper and added to the centre using glue dots. The label I attached 2 small die cut trees to and a sentiment stamped in misty moonlight ink, this then had a hole punched through it and a piece of the simple elegant trim attached.
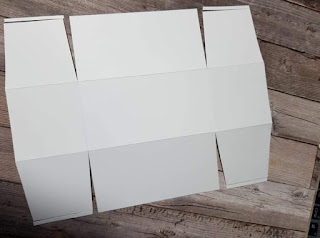
For the base you need a piece that is 6" x 12" and on the 12" side you will score at 2,4, 8 and 10". On the 6" side you will score at 2 and 4". On all of the score lines along the 12" side you need to cut up to the score line that runs along the short side, this is done on both edges of the 12" sides.
You will now need to cover all of the sections, I've just used papers on the outside and for the inside I've used papers along all of the flaps, but cardstock for the inside panels.
Each panel is covered, the only one that isn't is the base as this won't be seen. As the panels are all folded in on themselves it's best not to make them bulky, this is why I left mine plain.
For the box inside I constructed a small box that fitted inside the middle panel, decorated it and popped some delicious treats inside.
For my ribbon I took a length of the really pretty frayed grossgrain ribbon, cut it into 3 long strands and then tied these all together in a bow. I attached half of a snowflake onto my bow with a glue dot, stamped my sentiment, attached this using glue and then attached the bow on top using glue dots.
Strawberries 'n cream lindt chocolates inside and it's ready to gift to someone I love!
Hope you enjoyed the project I made for you today, now please do hop over onto the lovely
Karen Egan where on her blog you can see what delights she has waiting for you.
There is a full list of all of the participants in this months blog hop at the end of my blog post!
Until next time
Huge Crafty Hugs
Natalie xx
Product List
Simone Kleine - derdiedasKleine bastelt
Natalie Arnold (UK) - CraftyHunnypots
Karen Egan (UK) - Crafty Karen Designs
Nina Unbehau - Nina’s Kreative Welt
Anja Ehmann - Bastelanja
Liane Gorny - Jungle Cards
Melanie Fischer - MeeFischs Bastelecke
Petra Wittig - Cum Gaudium
Petra Masukowitz - PetMa-Kreativ
Angela Köber - Stempelfamilie


Cool idea with the box in the box!
ReplyDeleteIt's a real pleasure to have you in the hop!
Greetings from Germany, Simone
😍 FAB-U-LOUS
ReplyDeletewhat a great idea, a box within the box
ReplyDeletethanks for the tutorial
love greetings
Liane