

Hello hello and welcome back to another craftalong tuesday. As promised, I've had my break, and a lovely one it was too, and I'm back again with craftalong tuesday blog posts for you. I hope you have all been keeping well and finding plenty to do in your craft rooms, I know since I've been back from a really lovely break in the depth of the woods in norfolk, I've been very busy.
Today I have two small projects for you, using the really lovely 'Time of giving' bundle which you can find in the mini catalogue on page 61. The dies in this bundle are very versatile and so great to create with......... so let's begin.
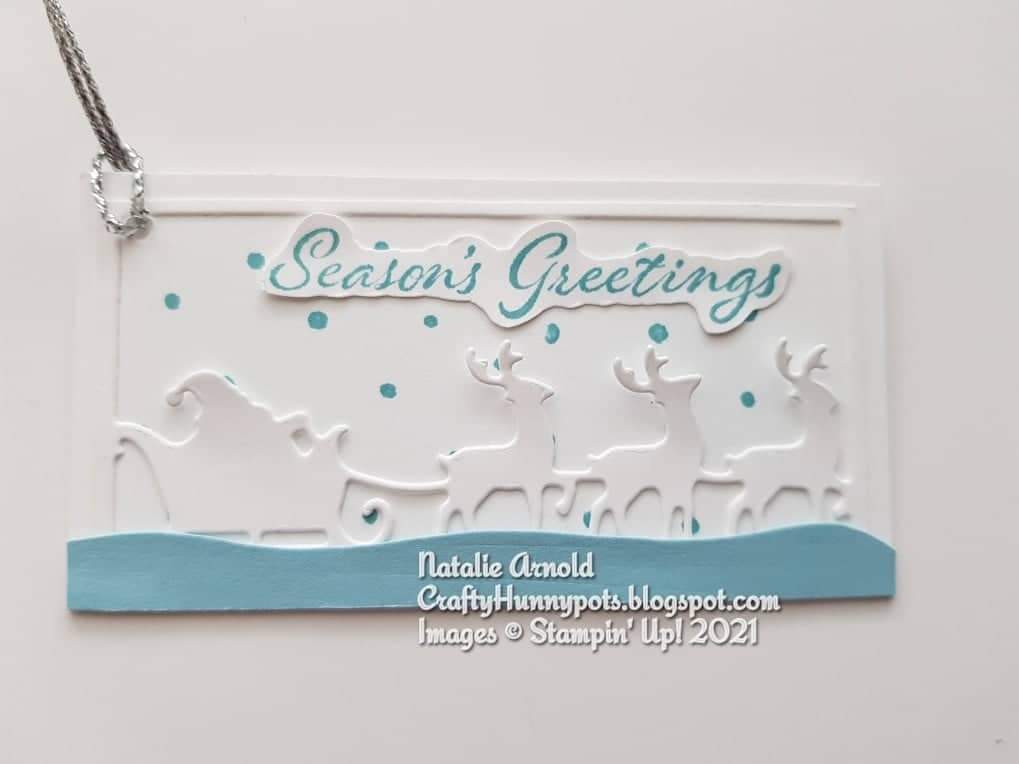
I've cut some basic white carstock for the base of this tag slightly bigger than the detailed part, for this I just cut myself a piece of cardstock (basic white again), around the edge of the die and then cut it out through the die cutting machine. For the base piece I've used a blending brush (153611), forgot to add it on the product list, and I've blended Balmy blue ink onto it very softly, I've then stamped with the same colour the dots and then i've glued the detailed piece on top, very tiny bits of glue or the glue will oose out and ruin the inked part. The sentiment is just stamped in same ink again and then fussy cut around and attached to the tag. I've cut a strip of balmy blue cardstock the same size as the tag width and then I've fussy cut with my snips so it looks like a snow drift, this is then attached to the tag. The hole is punched in the corner using the label me fancy punch and then the trim is attached.

I've done the same for this tag as before, except i've die cut the snowflake one this time. The sentiment is done the same way only it's then been cut into 2 and attached to the tag as seen. I've then die cut one of the tiny snowflakes out and blended some of the ink with the brush onto it holding it down using the pokey tool on the take your pick tool. This is then attached to the tag using a tiny bit og glue just in the centre part, then 3 rhinestones are attached.
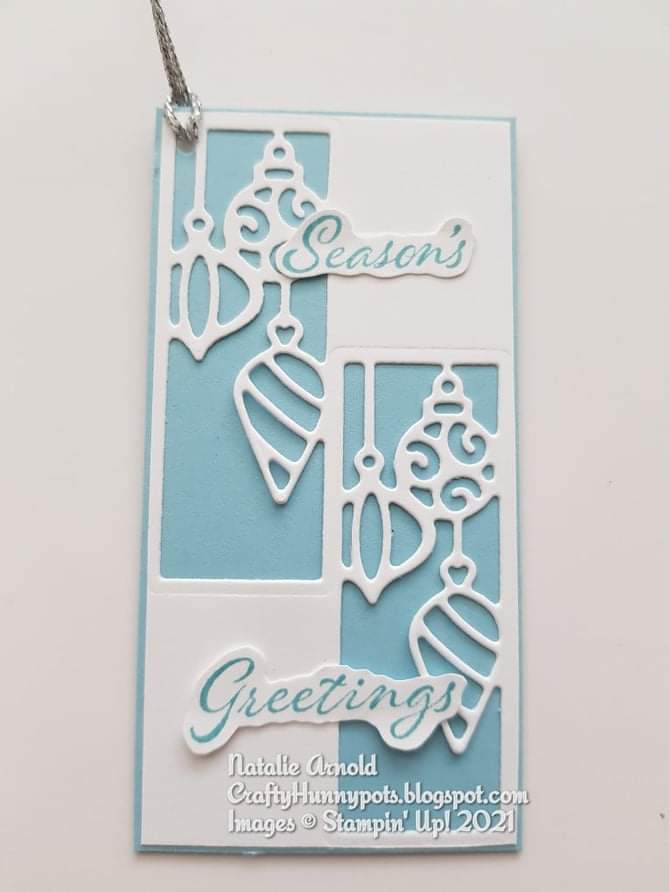
For the last tag the base part is in balmy blue instead of white and the detailed piece is die cut twice, once on either side as this die is alot smaller than the other ones. Everything else is the same as for the other two tags.
Now for the second small project.........

A fun litle card, using the same bundle, but looks completely different.
I've taken a blackberry bliss layer onto the basic white thick card base for this one, I love this colour it's so rich and vibrant, although it might be a bit hard to see in the picture that I've used this colour, trust me though I have! I've then used a piece of the basic white card and given it a splatter of blackberry bliss flicking my dark stampin' blend from the lid, be careful doing this though as you mights get ink on yourself :). I stamped some of the images with crumbcake ink and stamped some of the dots again like we used for the tags, this time in old olive ink.
The tag has been punched out using the Everyday label punch and crumbcake cardstock. To get the white piece to run across the top of the tag, I cut a piece the width of the middle section and then slid it into the punch carefully, just cutting the section out that I needed.
This is then glued flat to the tag, the sentiment is stamped in blackberry bliss ink and fussy cut out again and then attached on top of the tag. I've placed dimensionals onto the reverse of the tag, not too many as you need to slide some of the leaves underneath in the corners.
I've die cut an assortment of the leaves out, what's nice is the die cuts out 5 at a time so it's quite quick to do. These are then attached to the card wherever you like and also 3 of the old olive decorative matte dots and that is the 2 projects - 3 tags and 1 card finished and I think you will agree that this set is a very useful one to have .......... making your own christmas gift tags what could be nicer, and I'm sure the children in our lives (grandchildren even) would love having a go at them too!
Hope you enjoyed the first craftalong tuesday for September and enjoy making the projects I've made for you.
Until next time
Huge crafty Hugs
Natalie x
SEPTEMBER HOST CODE
R2GX9H33
FOR ON LINE ORDERS WITH MYSELF UNDER £150
Please use this code if shopping with me on line so I can send you a small gift in the post the following month to say thankyou.

Don't forget saleabration is still on till 30th September so remember for every £45 spend you can grab yourself one of the free items !
Product List
") |  | |
 |  |  |
 |  | |
 | ||
 |  | |
 |  |  |
 |  |  |
 |  |  |
 |  |  |
 |
")


Fabulous tags and card, love the colours and will definitely need to case you for that tag design! Many thanks for sharing your beautiful designs :) x
ReplyDeleteLove those Christmas tags Natalie….and I think the balmy blue is definitely one of my favourite colours x
ReplyDelete