

Hello again and welcome to another tuesday make.
We've been having some really lovely weather here in Essex the last few days and I don't know about you, but I do struggle a little to get motivated when the weather is hot!!!!
Anyway I managed to get this little card done for you all, hope you like it.
I wanted to share with you all a card I've made in the past but thought it was time to bring it back again. The style of the card we're making today is known as a 3D cube pop up box card, and it's perfect for fitting in an envelope as it folds flat.
So let's get started.........
Materials needed:
Soft seafoam cardstock
2pc - 4" x 8 1/2 both scored on the long side at 2", 4", 6" and 8" back cube
1 of these pieces you now need to cut in half on the 4" side @ 2" these pieces form the 2 smaller cubes for the front of your card.
1pc - 1 3/4" x 1 3/4" embossed and then cut in half corner to corner giving you 2 x triangles for the front cubes.
Scrap piece to die cut 2 x ferns.
Forever greenery dsp
4pc - 1 7/8" x 3 7/8" these pieces go on the inside of the back cube
12pc - 1 7/8" x 1 7/8" - 6 pieces for the inside panels of your smaller cubes (bottom, front and back not top as it doesn't show), the other 6 pieces are for the outer of your cubes and the 2 sides above the smaller cubes.
2pc - 1/2" x approx 1 1/2" to be folded in half and used to glue your large sentiment circle onto the inside of your cube.
Gold foil sheets
Scrap pieces to die cut 2 scallop circles and 1 stitched circle plus 4 tiny ferns.
Whisper white thick cardstock
Scrap pieces for die cutting 2 small circles and 1 larger circle to mount on your gold circles.
Shaded spruce cardsock
Scrap piece to die cut 2 ferns
Card recipe:
1. Cut, score and burnish you soft seafoam pieces for your cubes. The small 1/2" section that is at one end you need to mitre the corners slightly add glue, and fold the card onto itself to form your cubes.
2. Cut all of your dsp pieces and glue the inner back cube pieces into place.
3. Now glue all of your pieces to the insides of your smaller cubes (only 3 in each), glue these cubes to the back cube, making sure the section inside the smaller cubes without dsp on it is in the top position . Make sure you have everything lined up nice and squarely otherwise your card will not stand up very well.
4. Glue the rest of your dsp pieces into place ( one on each side of the smaller cubes and one on the side above the smaller cube ontothe back cube.
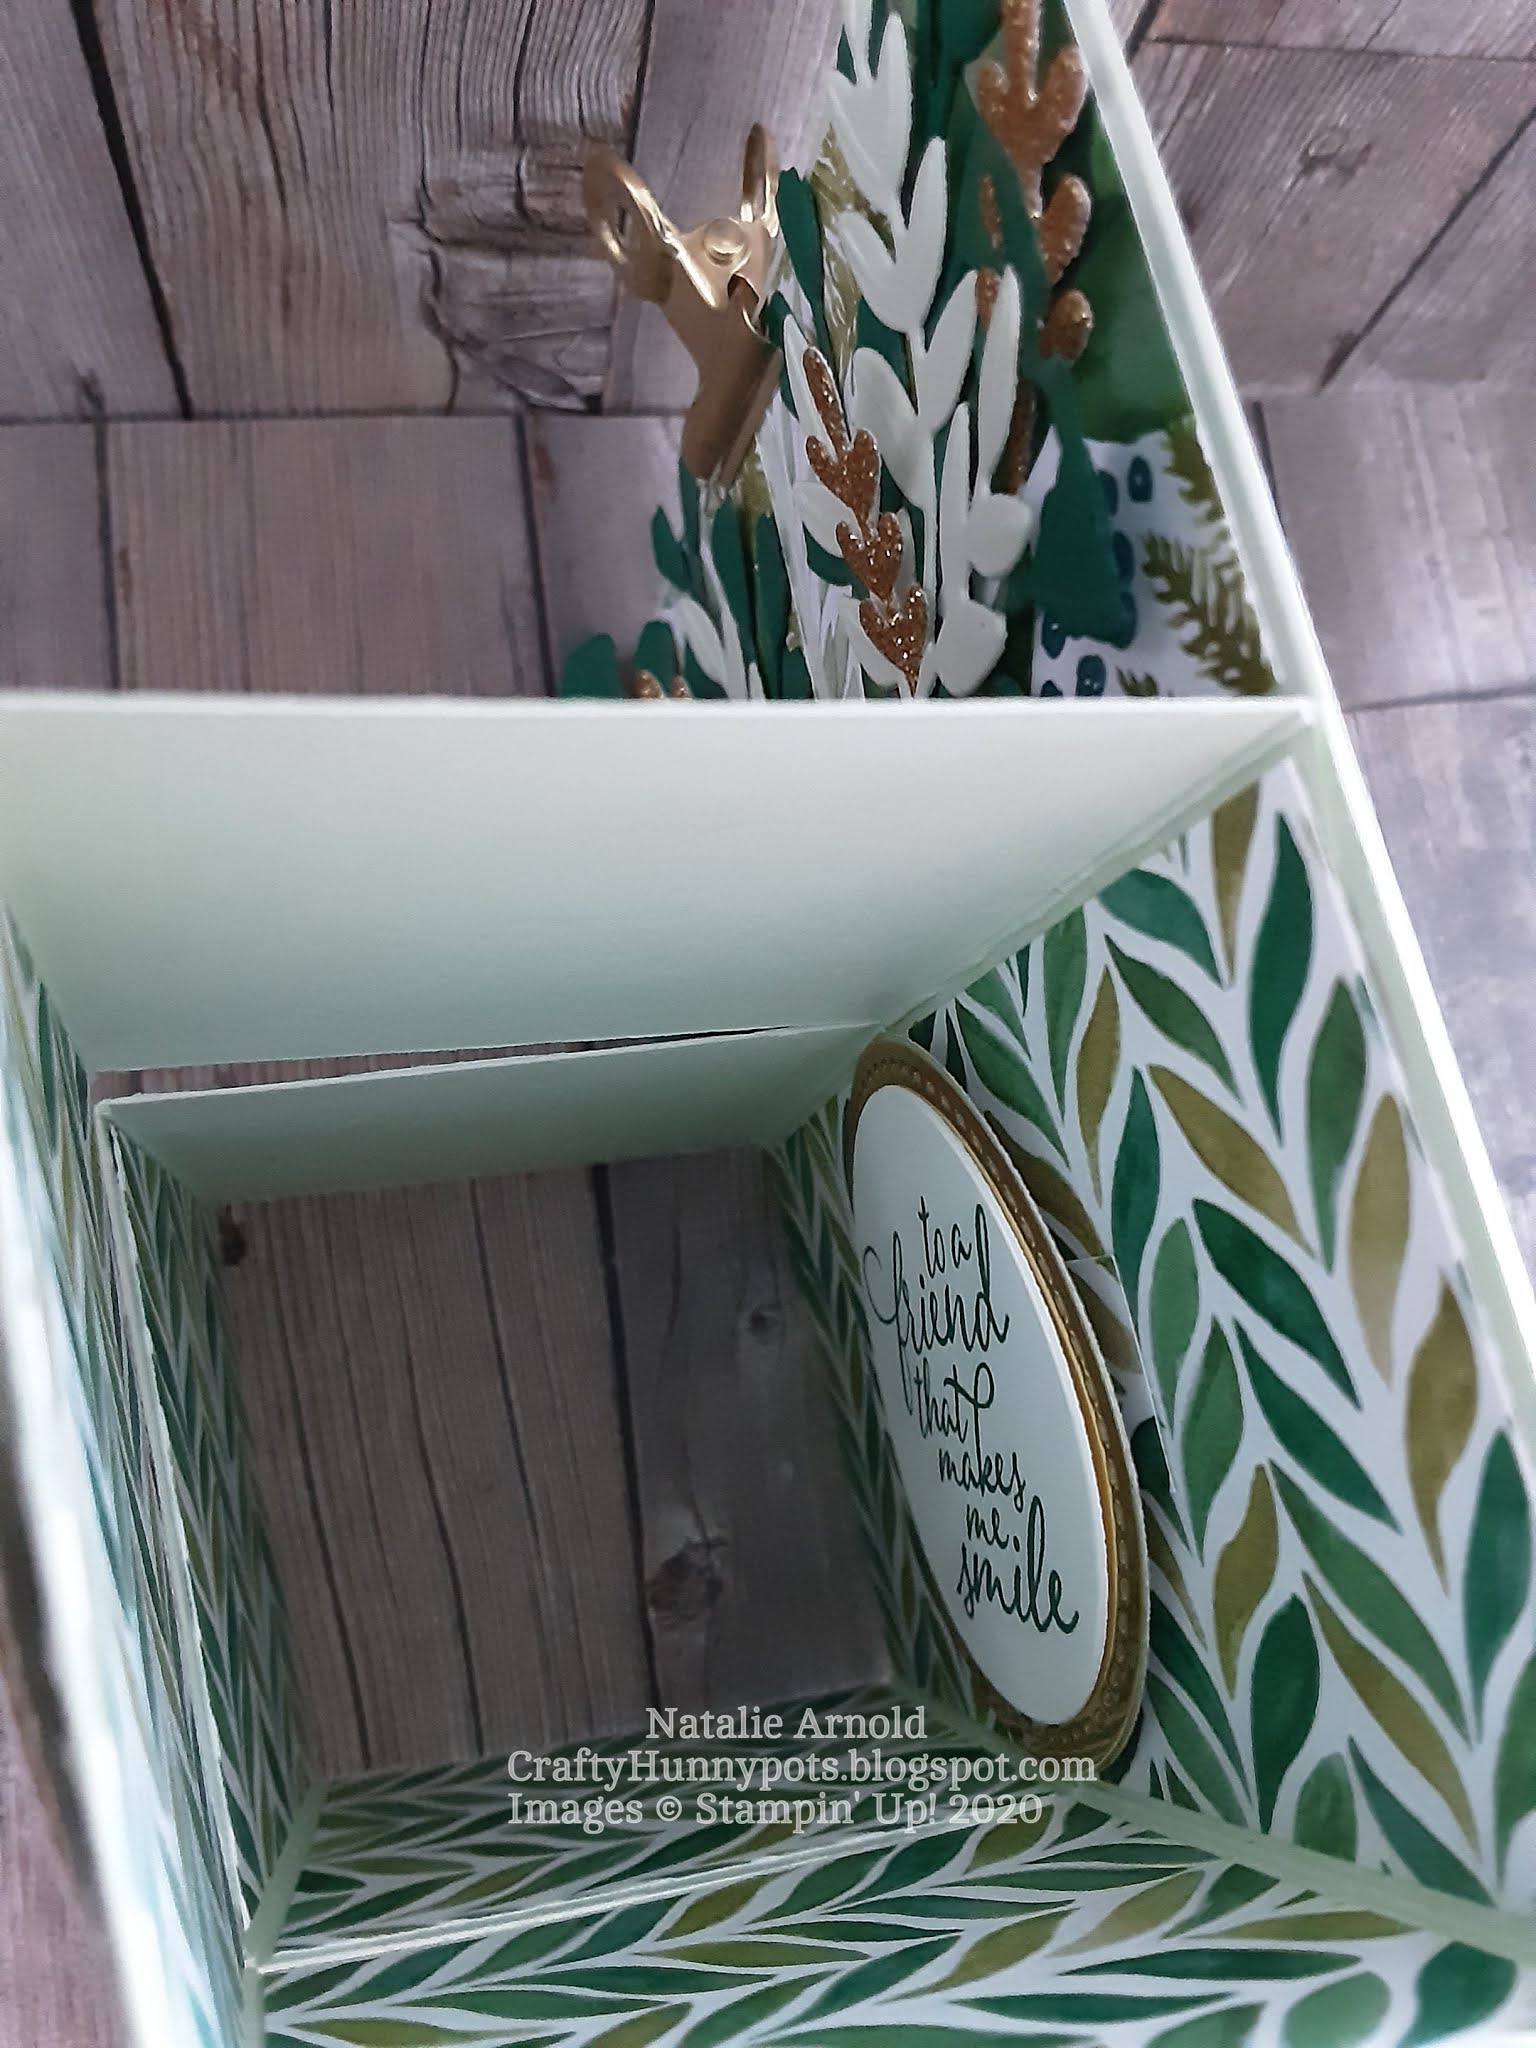
5. Now the next piece is a bit tricky but you have to do this when you have all of your cubes glued together. I've attached a picture for you to see below you just have to imagine that it's the all of the cubes stuck together.

With your 2 pieces of 1/2" x 1 1/2" strips folded in half you need to glue one side of each of them to the sides of the cube having it flush with the edge of the cube, they will meet in the middle, you can now place glue carefully onto the othersides of the dsp ( the sides that are loose in the picture), and glue your sentiment ( you will need to stamp sentiment and glue the circle layers together first) into place. You can very careully fold the back cube flat on itself giving you something to push your sentiment on to, making it a bit easier, try nd get it central with everything as it makes it alot easier to fold it all flat on itself.
Hopefully the pictures below will help.


6. Now once you've done the rest of your stamping and die cutting of circles and ferns, and the embossing of your 2 squares, which are then cut into triangles, you can glue them all into place, everything is glued flat into place except for the 2 sentiments which once both of the circles have been glued flat together you glue them onto the card using stampin' dimensionals.
The back cube will fold flat with the 2 smaller cubes folding up and flat making it easy to place into an envelope.
Hope you enjoyed the project and you give it a go, please do contact me if you have any questions about the project or joing my team at Stampin' Up I'm always here to help so please drop me an email nataliearn50@hotmail.com
Products used:


JULY host code for orders under £150
WPSMKEK9


Beautiful card Natalie, love this fold and how it goes flat to fit in an envelope. Your instructions are fab. Thank you for sharing xx
ReplyDeleteThankyou Ruth it is a really lovely card to make and its brilliant that it folds flat thanks for your comment xx
ReplyDeleteLoved putting this together....thanks Natalie
ReplyDeleteYou're so welcome Debbie glad you enjoyed making it x
DeleteWowzer, absolutely stunning card Natalie, love the fun 3D element, all your detailed decorations and the colours, just wonderful :) x
ReplyDeleteThanks so much Anne very kind of you to say x
Delete