About Me

My photo
My name is Natalie and I love anything to do with card/paper. I have been a papercrafter for many years now and I never get bored playing with all the wonderful products available. I've been married to my wonderful husband Nathan for 35years now and we are still very much in love with each other as the first day we met each other. We have 3 wonderful children and 5 gorgeous grandchildren so we have lots to be thankful for. Since joining Stampin' Up! in 2018 I've grown so much in confidence with myself and I even tackle technology, which for me is a huge step to have taken, but I'm getting there slowly.

Tuesday, 18 May 2021

Seascape - Birthday card


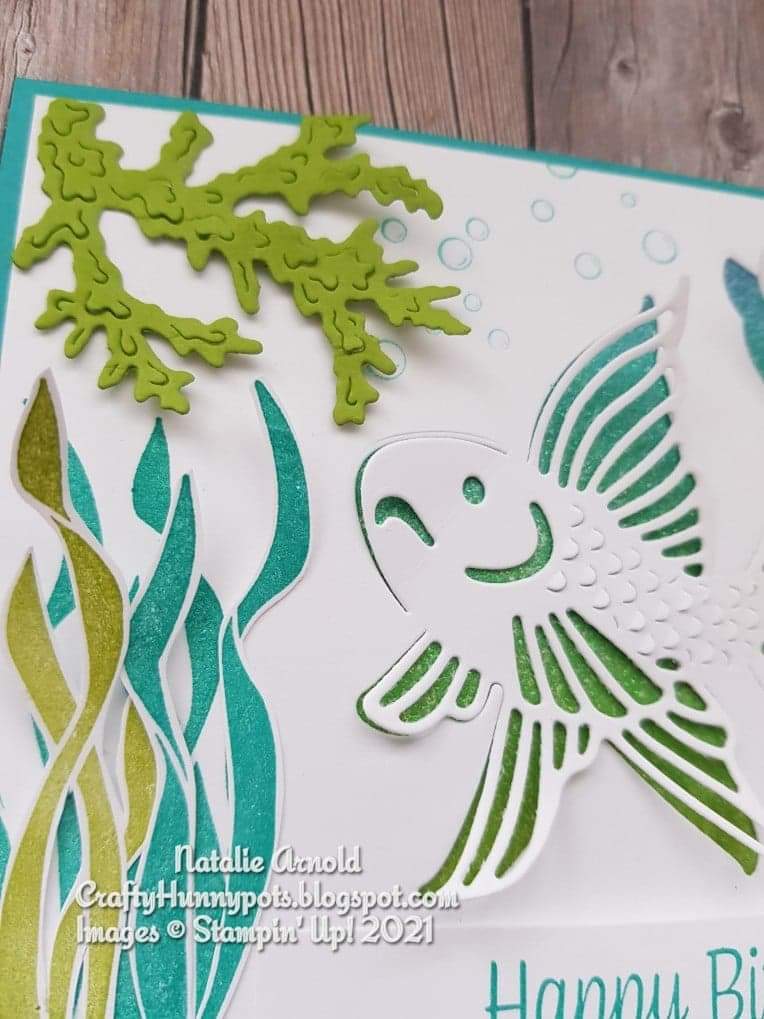
Hello again and welcome to another Craftalong tuesday, I'm very excited this week to be bringing to you a brand new set from the new annual catalogue called 'Seascape' bundle. This is such a cute little set it comprises of a stampset with some lovely stamps on to enable you to make a lovely seascape (hence the name) and a die set which comprises of 4 dies, and as you can see below the fish and seahorse can be either cut onto a piece of card, or you can snip the sections that attach them to the card piece and use them on their own, and you have a beautiful piece of coral that can be used as a whole piece or cut into smaller sections as on my card I've created for you, and last of all the really cute little fish that you cut out together using the one die but they are seperate to each other once cut, fabulous little set to have in your collection!

Such cuties!

Easy to cut into pieces!

Ideal for colouring in with finger daubers!

Love this flowing fish effect!

Let's now get started with todays project.............

MATERIALS NEEDED:

Bermuda Bay cardstock
1 piece - 14.85cm x 21cm scored at 10.5cm for the card base

Basic white thick cardstock
2 pieces - 10cm x 14.35cm for the inside and front of card layers
1 piece - 1.5cm x 9.5cm for the sentiment
Scrap pieces for stamping the seaweed and fussy cutting out

Granny Apple Green cardstock
Scrap piece to die cut out 1 piece of coral to be cut into 2

Rainbow Glimmer paper
1 piece approx 9cm x 9.5cm to cover the underside of the fish 

CARD INSTRUCTIONS:

Fold and burnish the card base.
Die cut the fish onto one of the pieces, give the fish fins a slight curl with your bone folder or use your fingers, but be gentle you don't want to pull the fins off....


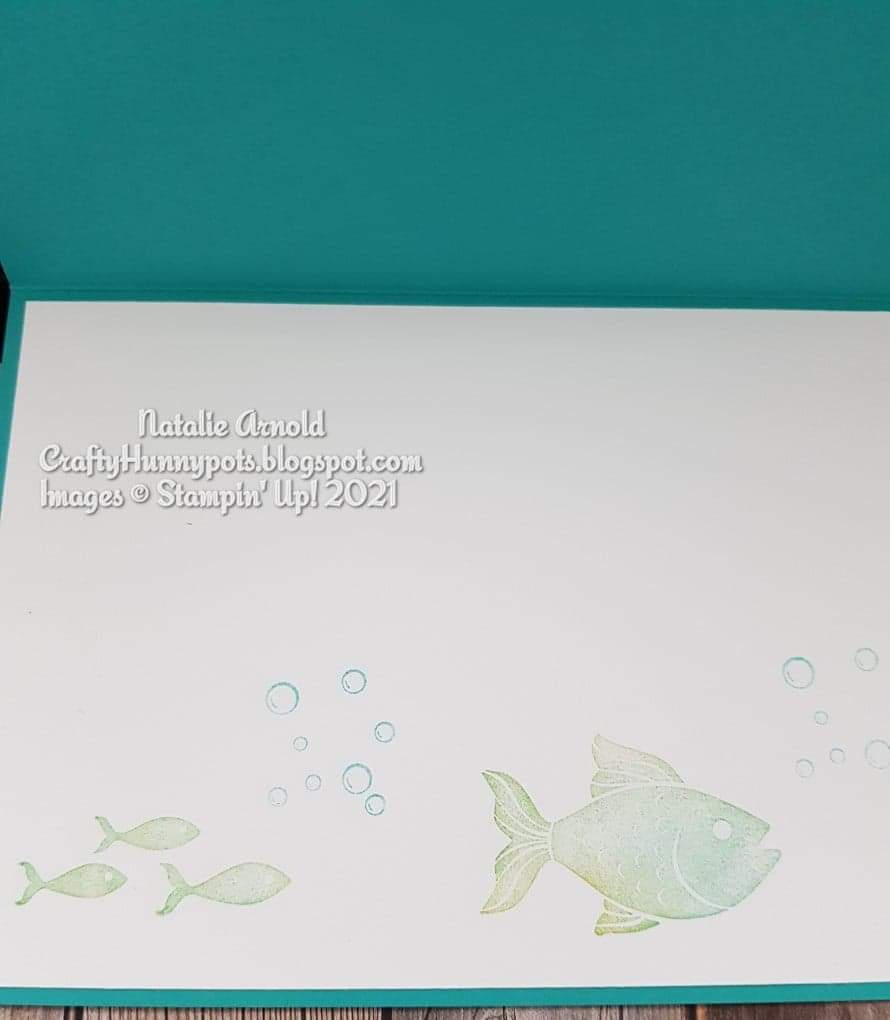
Using a couple of the finger daubers gently dab the 2 colours of inks onto the fish stamps and stamp onto the card piece for the inside of the card, stamp the bubbles on also and then glue this piece onto card.

Just love these litle fish they're soooo cute!


On the piece of card that you've die cut the fish into, ink the seaweed on either side at the bottom, and the bubbles on the top, stamp some seaweed in the 2 ink colours onto the scrap piece of card and then fussy cut them out using the snips. Glue these pieces into place after the glimmer card  has been attached to the reverse side showing through the fish, wet glue is applied onto the reverse side of the white card and the glimmer paper is layed onto it, this way the glue is only being placed where it is needed. Now glue this whole piece onto the front of the card.
The coral die cut pieces are glued into place, try not to put glue all over the back of them as they don't need to be glued down flat, you want to have depth to them making them look more realistic. 
The sentiment that I have used is from the 'Sweet as a Peach' stampset,  I've used bermuda bay ink and then once dry I've curled the whole piece of card using my bone folder and just applied glue onto the ends, so that it curves when glued into place.

Think you might just be able to see the sentiment curving slightly.

That is todays card finished, I really love the simplicity of this card, and the colours I always think look so lovely together. Hope you enjoyed the project and have as much fun with this bundle as I am, I think it's a really cute and creative set to be used for all sorts of cards - male or female.
Happy Crafting!

Huge Crafty Hugs
Natalie x

MAY HOST CODE
XRBMP6U7
Please do use this code if shopping with myself on line and your order is under £150 to receive a small thankyou gift and card in the post the following month.


 Product List

Paper Trimmer
[152392]
£23.00
Paper Snips
[103579]
£9.25


Wednesday, 12 May 2021

Sweet strawberry bundle - Blog hop touches of ink


 Hello again everyone and welcome to another Touches of Ink Blog Hop run by the wonderful Simone Kleine. I love taking part in these blog hops as there are so many lovely and very talented ladies on here, and we all come from different parts of the world too, which to me makes this  very special, and I'm so proud to be able to say that I'm part of it! 
You've probably just hopped over from the lovely  PETRA WITTIG  where you will have seen her amazing creation, but don't worry if you haven't the links for all of the talented ladies are below this post for you to hop on and have a little look, I'd just like to thank you for stopping by and taking the time to look at mine today.................


The theme for todays post was to the delightful 'Sweet Strawberry' bundle which I absolutely love using, it's a stampset and punch and you can creat some amazing projects with it. 
This bundle first appeared in the mini January - June 2021 catalogue but it has actually carried over into the new annual catalogue, the only difference is it's not available as a bundle, so I suggest if you really like it and wish to purchase it get it now while it's a bundle and save 10%!...............
I've made 2 cards for you to look at today the first as you can see is a birthday card, which I've used a normal card base using the Real Red cardstock and put the same colour layers inside and on the front of the card.
I've cut myself a piece of White cardstock and a piece of In colour dsp so that when together they make another layer for the front of the card and then I've cut myself a small strip of the Real Red, which I've dry embossed using the Greenery embossing folder and glued this over the joins, covers it up perfectly!
I've stamped the strawberry leaves and flowers using the Evening Evergreen ink and then using one of the Blender pens  I've blended the ink to fill in the images, this gives a really nice almost water effect to the images, I've then used the dark Daffodil delight stampin' blend inside the centres of the flowers and fussy cut them all out using my Snips.


I've stamped the strawberries using the Real Red ink and the straberry hulls using Evening Evergreen ink and then punched them all out. The flowers/leaves and the singular flowers are all adhered to the card using glue, after giving them all a bit of a curve using the Bone Folder, making them all look a bit more 3D.
The tags are both cut out using the brand new Tailor made tags dies, I've die cut one in the White cardstock and stamped the sentiment on it using the Real red ink, the other in the Evening Evergreen shimmer vellum after tying them together using a double strand of the White Snail Mail Twine and applying a Glue dot in between them both (this holds them together firmly) they get attached to the card front using glue,


the strawberries are all attached using Dimensionals.


The second card I have for you is a really simple card using White for the card base and a piece of the In Colour dsp slightly smaller for the card front.

I've done exactly the same as the first card for all of the strawberries, flowers and leaves. I've attached a  White die cut circle which is dry embossed, this time I've used the Tasteful textile 3D embossing folder, using Dimensionals to the front of the card. Two strips of cardstock Real Red and Soft Succulent are attached across the circle and then all of the elements are attached, the same as the first card, glue for the leaves and flowers and Dimensionals for the strawberries. The sentiment this time is stamped using the Evening Evergreen ink and then fussy cut around each word using the Snips. 


Hope you enjoyed todays cards, I loved making them to share with you all, almost as much as I like eating strawberries lol.......... well they are yummy!

Now you need to hop on over to the lovely CHRISTIANE KNAPP  and take a look at the wonderful creation she has made for you all to see.

Huge Crafty Hugs

Natalie x


Full list of the Blog Hop

Simone Kleine - derdiedasKleine bastelt

Iris Philipps - Der Papierhimmel 

Liane Gorny - Jungle Cards
Katja Martins - Stempelpfau

Melanie Fischer - Meefischs Bastelecke

Angela Köber - Stempelfamilie

Nina Unbehau - NiNa’s Kreative Welt

Petra Wittig - Cum Gaudium

Natalie Arnold (UK) - Craftyhunnypots

Christiane Knapp - StempelPalast

Petra Masukowitz - Petma-Kreativ 

Kim Kroeker (CA) - Stampin’ with Kim Arlene 

Lu Fischer - Stempeljagd

MAY HOST CODE

XRBMP6U7

Please use this host code if your order comes to under £150 and you are shopping with myself on line. This will enable me to send you a small thankyou gift and a card in the post the following month x


Product List

Blender Pens
[102845]
£11.25
Paper Trimmer
[152392]
£23.00
Paper Snips
[103579]
£9.25
Bone Folder
[102300]
£6.50