Hello again and welcome to another Craftalong Tuesday. This week I thought we'd use the delightful 'Hydrangea Haven' suite as it is so pretty, and to be honest I couldn't resist getting this one. Not only do you get a great set of dies with lots of possibilities in using them, but you also get a whopping 22 yes that's what I said 22 stamps. I haven't used many stamps because as you all know I can't share stamped images with you all when sending the kits out, so I've used sentiments only for my card, that way you can add your own sentiments. So let's get started with the card for today, I hope you enjoy making it .
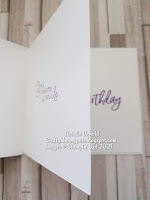
The card is made in the book card style which can be one layer, or you can add pages inside, which is what I've done, well I've added two.....
Materials needed
Basic white thick cardstock
1 piece 4-1/8" x whole length of A4 (UK) scored at 4-1/2" and 5-7/8" - for card base
Basic white cardstock
2 pieces 4" x 5-3/4" - for the inside pages (one of them score at 1-5/16")
1 piece 3/4" x 3-3/4" - for sentiment
Gorgeous grape cardstock
1 piece 4" x 4-1/4" - front of card layer
1 piece 4" x 1-1/4" - front of card side layer
1 piece approx 1" x 5" - die cutting small flowers out
1 piece approx 2-1/2" x 2-1/2" - die cutting flower layer out
Hydrangea Hill dsp
1 piece 3-7/8" x 4-1/8" - front of card layer
1 piece 3-7/8" x 1-1/8" - front of card side layer
Old olive cardstock
1piece approx 3-1/2" x 5" - die cutting whole flower out
Mossy meadow cardstock
1 piece approx 2-1/4" x 3-1/2" - die cutting flower stem out
Seaside spray cardstock
1 piece approx 1" x 4" - for sentiment
Gorgeous grape sheer ribbon
1 piece approx 14" - to wrap around card and tie in knot
Pastel pearls
Stampin' Dimensionals
Gorgeous grape classic stampin' pad
Card Instructions
Score and burnish the card base, the front of card is going to be the section that has a score line on it.
Glue the dsp pieces to the gorgeous grape pieces and glue flat to the front and side panel of the card base.
Wrap the ribbon around the side section, so that it is on the inside of the card and not around the back, and tie in a knot at the front.
Stamp the sentiments onto the 2 pieces for the inside of the card, making sure you know which one you want as the first page, and making sure the sentiments are to one side and not in the middle.
These are the products I've used for the project just click on them to be added to your basket. Thanks in advance xx
Product List


Beautiful beautiful beautiful ☺️ love it
ReplyDeleteAwwww tahnks Debbie enjoy putting your one together x
DeleteAbsolutely beautiful, fabulous colours, love this suite, so
ReplyDelete... Beautiful :) x
Awww thanks Anne it is a really exquisite suite with some beautiful colours in it x Natalie
Delete