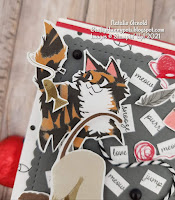
Hello everyone, and welcome to another SUO challenge. This time the theme is - 3D items such as gifts, tags, boxes and bags etc. I've chosen to make a cute little treat box for one of my granddaughters, as she loves sweets (what teenager doesn't) and she absolutely adores cats - she has 3 herself, so I thought this would make a lovely little treat for her and then she could use the treat box as a small trinket box once empty, and trust me that won't be full for too long...........
Please make sure you pop on to see all of the other designers makes as there are some beautiful projects that everyone has contributed to this weeks challenge at SUOC#268
Don't forget to take part in the challenge yourself and enter your make, I would love to see what you have made and comment on your blog..........
So let's get on with the project hope you like it.......
Materials needed:
Love you always treat box
1 x outer
1 x drawer
Real red cardstock
1pc - 4" x A4 length
2pc - 2-1/2" x 1-3/8" drawer ends
Playful pets dsp
1pc - 3-7/8" x 12"
2pc - 1-1/4" x 2-3/8" stripey pattern drawer ends
Sheet with the cats on
Sheet with the wordings on - cut 1 long strip then divide each word seperately
Basic Gray cardstock
2pc - approx 3" x 4"
Playful pets trim combo
1 length - approx 6" of black and white twine
2pc - approx 5" for bow and handle pull
Playful pets trinkets
1 x heart for handle
Matte black dots
Approx - 9 for top and sides of box
Treat box recipe
1. Make the box outer and drawer up and place them together (this makes it sturdier whilst decorating).
2. Take the large real red piece of card and score one end at 1/2", then burnish it, this will be the first part stuck to the base of the box outer, then wrap the remaining cardstock around the whole outer, scoring every edge and glueing as you go. Once the end is reached and it covers the first small flap then use scissors to cut off the waste piece.
3. Now repeat this step again using the piece of dsp which is slightly narrower than the red card (making sure you keep it nice and tight so it doesn't pukker up).
4. Glue the red and the dsp pieces on to both ends of the drawer. Once dry using a whole punch or a piercing tool make a hole in the front end of the drawer so the ribbon can be attached and glued on the inside using glue dots, then attach the heart trinket using a small strand of the twine.
5. Die cut 2 of the second largest scalloped rectangles out from the 2 basic gray pieces of card and glue them together flat.
6. Roughly cut out all of the elements that are needed for the top of the box, and if liked glue them on to scraps of card before fussy cutting them out as this gives them more stability for handling (which will be alot when opening and shutting the drawer).
7. Glue all of the elements on to the rectangles placing the wordings flat first and then everything else can go over the top (the easiest way to glue the words down is to put a tiny amount of glue where they're going and then using the putty end of the take your pick tool to pick each individual word up and place it on to the glue).
8. Place some of the wordings on to the sides of the box along with some of the matte black dots.
9. Glue the small bow in to place.
10. Place the sweets or whatever treats you might want inside the box drawer and you're finished.
I absolutely loved making this little treat box it was so quick (as the box is already done for you) and fun to create. You can if you wish make this using the little dogs that are on other sheets of the dsp the choice is yours.
Now it's your turn to show us all of the wonderful 3D items that you can make and enter the SUOC#268 I'm looking forward to seeing them all!!!!
Take care everyone and keep crafting!
Huge Crafty Hugs
Natalie x
FEBRUARY HOST CODE - Y6P2CXDV
Please remember to use my host code for orders under £150 to receive a small thankyou gift and a card from me in the post the following month but as always if it's over this amount then please don't use it claim the rewards for youself.
Click on any of the items that I've used below to be taken straight to my on line shop and happy crafting!


Awww absolutely gorgeous project, I love the tail to pull to open the drawer, and yummy treats inside too! Win, win... many thanks for sharing :) x
ReplyDeleteThankyou so much Anne who can resist yummy treats and I'm absolutely loving these cute papers x
Delete